Today’s Health Morsel: Kale, Obviously

We all know kale is healthy – it’s even sometimes used as a standard against which to measure the health benefits of other veg. But not that many of us could pinpoint those benefits, so I’ll go over exactly what kale is doing for you, and share my favorite way to prepare it – the one way that really makes me want to eat it every day.

Most of my ‘health morsel’ posts include a full meal plan for the day. However, my favorite way to eat kale is not in a full meal, but see my Misr Wat recipe for an excellent lunch or dinner that includes kale.


20180316_103452.jpg

Oxidative stress results from compromised oxygen metabolism. Among the key players in oxygen metabolism are antioxidants. Kale has an unusually high concentration of flavonoids & carotenoids – two types of antioxidants. Oxidative stress plays a role not only in cancer development, but also in the development of cataracts, glaucoma, atherosclerosis, and chronic obstructive pulmonary disease.

Setting aside only nasturtiums, kale has the highest lutein (an antioxidant) density of any food, meaning that it’s protective against light and oxygen damage to the eyes. Even less than one cup of kale per week has been shown to decrease the likelihood of developing glaucoma.

Another contributor to a number of health problems, including cancer, is chronic inflammation. Fighting inflammation is a job that kale does well due to its ridiculous amounts of Vitamin K, and its omega-3 fatty acids. One should also eliminate inflammation-causing foods (animal products, salt, refined sugar, etc.) to feel the full benefits.

Kale also helps to lower cholesterol: certain components of the fiber bind bile acids, causing them to get ‘stuck’ in the digestive tract, leading to excretion. The liver uses cholesterol to make bile acids, so the more are bound, the more cholesterol the body uses up. In a head-to-head study, kale and collard greens bound more bile acids than any of the other vegetables tested. By eliminating dietary sources of cholesterol (animal products) and eating a diet rich in kale & other cruciferous veggies, many people have been able to reduce or stop taking cholesterol-lowering medications (this should not be construed as medical advice).

Glucosinolate is a phytonutrient contained specifically in cruciferous vegetables, which is turned by your body into the strong cancer-fighting isothiocyanates. Like in other cruciferous veggies, these anti-cancer agents form from the combination of 2 elements released by cutting or breaking the plant tissue. To allow for the full effectiveness to develop, you can chop the greens 40 minutes before cooking them (since only one of the elements survives the heat of cooking) or you can add powdered mustard seed to your dish after cooking.

Isothiocyanates, along with sulfur compounds also found in kale, help in our bodies’ cellular detoxification processes. In the modern world, there are toxic agents, such as exhaust fumes from vehicles, everywhere. We really need all the help we can get in this respect.

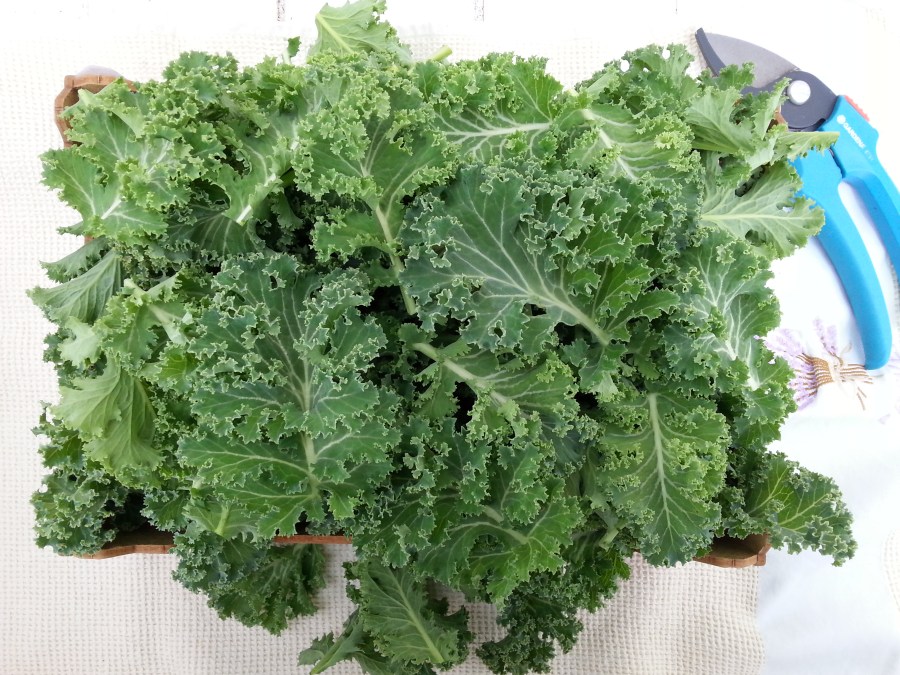
So, which type of kale is best? As Dr. Greger often says – it’s the type that you’ll eat the most of. But for an extra edge, go with the curly-leafed varieties. They tend to have higher concentrations of glucosinolates than the broad-leafed varieties.

My favorite way to eat kale is kale chips, very simply prepared and oil-free. They can be eaten on the side or sprinkled on top of various meals, or by themselves as a snack. The beauty of kale is that it’s so hardy – I’ve found that I can freeze kale from my garden, and still turn it into crispy chips! That is amazing! If you don’t want to bake them, as I do, look up a recipe for making them in a dehydrator. I haven’t tried it yet, but I certainly will at some point.

Kale Chips

Remove the stems and rip or cut the leaves into bite-sized pieces, and place in a mixing bowl. Add black pepper and nutritional yeast to taste. Now you have 3 choices –

  1. Add a very small amount of salt, and just enough lemon juice to coat the leaves, without leaving any liquid in the bowl.
  2. Blend lemon juice together with some miso paste so that it’s got enough fluidity to incorporate well with the kale. Then mix everything together. Again, you don’t want any fluid sitting at the bottom of the bowl.
  3. Use about 1/3 tamari and 2/3 lemon juice to coat the leaves, as described above.

Spread onto a baking sheet covered with a silicon mat or baking paper. Bake at 350°F/175°C for 10 – 15 minutes. Keep an eye on them to make sure they don’t start to burn around the edges.

Advertisement

Recipe Review: Mushroom gravy

I love potatoes! And I love gravy because it helps me eat potatoes! Being able to make a fantastic, rich, hearty, vegan, oil-free gravy was initially a worry for me. I thought it would be difficult to get something that wasn’t a bit insipid without using some sort of fat. Turns out, it’s fabulously easy to make a lovely, satisfying gravy. I tried out a number of different recipes, and here is my absolute favorite…

I adapted this recipe from one I found in the NYTimes Cooking section. The original recipe, though, starts out with 1/2 c extra virgin olive oil. Wow – that’s a lot of oil, and it’s completely unnecessary because, as I’ve discovered, the oil is NOT the flavor foundation. It’s caramelization! For those of you who don’t know what that means, it’s when you cook something until the sugars come out and convert into a sweet brown sauce, like syrup. Many cooks will add a sugar source, like honey, to onions when caramelizing them but that only adds extra sweetness – there’s enough natural sugar in the onions (and pretty much any other vegetable) for them to caramelize without the help of external sugar sources. So, that’s what we’re going to do with our gravy, and then we’re going to balance it with soy sauce, and it’s going to be amazing. Try it out!

One more note before we begin: bouillon! Having an excellent bouillon is going to really make your gravy stand out. I make my own in large batches and freeze it. It’s salt-free, but loaded with herbs & spices, and I use the scraps from all the vegetables I cook. I just throw them in a bag in the freezer to keep until I’m ready to make my next batch. Because this recipe uses soy sauce, you should try to find a salt-free vegetable bouillon if you don’t make your own.

20170820_201206.jpg

Ingredients
  • 1 medium onion (about 110 g), very finely diced
  • 4 oz (120 g), or 1 c very finely diced mushrooms
  • 3 T arrowroot starch or 1/2 c (65 g) flour
  • 4 – 5 c bouillon (depending on how thick you want it)
  • 1 T soy sauce or tamari
  • 1/4 tsp black pepper
Cooking Instructions
  1. Sauté the onions & mushrooms in a large pan until nicely caramelized.
  2. Mix in thickening agent and cook for a further 3 – 5 minutes, stirring constantly.
  3. Slowly whisk in bouillon until the gravy is smooth and starting to thicken.
  4. Stir in soy sauce/tamari & pepper, and simmer until the gravy has reached the desired thickness.

The beauty of this recipe is that it’s so malleable. You can use whatever kind of mushrooms you want, to get exactly the flavor that you’ll enjoy the most – if you love cèpes, use them; if you love porcini, use them. Hell, if you can afford Périgord black truffles, and this is how you want to use them, go for it. But plain white mushrooms give it a great flavor, and they’re inexpensive.

You can also use whatever thickening agent works best for you, and play around with the amounts a little bit. If it gets too thick, just add a little more bouillon – easy enough.

Finally, if you like chunky gravy, like I do, serve it as-is. If not, just pass the mixture through a sieve before serving.

Nutrition Information

First – ignore the sodium content if you’re using a homemade salt-free bouillon. I generated the nutrition info using cronometer. They don’t have homemade salt-free bouillon in their food list, for rather obvious reasons. I selected low-sodium vegetable bouillon. (And, frankly, I’m left wondering what they think “low” means.)Mushroom gravy nutrition info

As this is just a gravy, we’re not going to be getting a whole lot of our checklist items taken care of, but that’s not the point here. In order to get all those lovely veggies and grains, we need some good sauces to help them go down!


Recipe Review: 10-minute toddler-friendly pasta

I have a tendency to cook spice-heavy dishes. I love cumin, paprika, coriander, fennel seeds, caraway, turmeric, & fenugreek, to name a few, but it’s not for everybody.

In the region of France where I live, the craziest that people tend to get is a few dashes of nutmeg – people’s palates here are generally accustomed to much more salt, fat, & sugar (much like the standard American diet), and not to a lot of herbs and spices. I rarely have to tone it down for my partner, luckily, but if I’m cooking for his family, I have to be a little more conservative when it comes to the spice cupboard. I’ve found that the dishes my friends & family in the U.S. might consider to be “toddler-friendly” tend to go over better.

This particular recipe is an intersection – it’s friendly to the more subtle palate, and I happen to love it, too! It’s the second I’ve tried that uses a mix of hummus & tomato sauce very successfully. It was, for me, an unexpected match made in heaven. What is particularly nice about this recipe is that you can use whatever vegetables you have on hand as add-ins. They’re puréed and the flavor is masked by the stronger flavors of hummus and marinara, so little veggie-avoiders are none the wiser. If you’re making it for adults, well, most adults, you can leave the extra veggies whole. I like to add peas to the cooking pasta 2 minutes before it’s finished. It takes almost zero extra effort, and it’s both beautiful and tasty.

20170502_111826.jpg

I found the original recipe on Oh She Glows, one of my go-to sites for amazing vegan food. Many of the recipes I find there, I adapt by eliminating oils or reducing salt, but this one required no mucking about. The only thing I changed from the original was to exclude the hemp hearts – that’s not something I can get around here, and it’s not worth ordering online, for me. Visit the link above for lovely pictures and the original recipe. This is how I made it:

Ingredients
  • 6 c (715 g) cooked whole wheat pasta, which is 3 c (340 g) dry
  • 2 c (475 ml) marinara
  • 1/2 c (125 ml) hummus (store-bought tends to have a lot of oil, so follow the link for my oil-free hummus recipe)
  • 1 tsp garlic powder
  • 2 c (200+ g) chopped cauliflower or whatever other vegetable you want
Cooking Instructions

This one’s crazy fast & easy.

  1. Boil cauliflower for about 10 minutes, until softened, and drain. Remember, to get the most benefit from cauliflower, you can cut it 45 minutes before cooking it, or just mix a little bit of mustard powder into the finished dish.
  2. Combine marinara, hummus, cauliflower (or other vegetable), and garlic powder in a blender until thoroughly mixed.
  3. In a large pot, combine cooked pasta & sauce, and cook until heated through. You can skip this step if your pasta is hot off the stove, especially for younger kids – the hot pasta will warm up the sauce without making it too hot to eat right away.
Nutrition Information

This recipe is meant to feed 4 adults, so I used the appropriate amounts of pasta and cauliflower to fit in with the daily dozen. The information below is for 1 serving, or 1/4 of the above recipe, including the pasta.

10 minute pasta nutrition info
generated using cronometer.com

The high sodium content here is due in large part to the fact that I used a commercially produced marinara sauce to generate the nutrition facts. For a lower sodium content, make your own marinara or buy one that is low in sodium. My favorite thing about making my own marinara is that I can add as much tarragon as my heart desires. For me, that really makes the sauce. It’s the sole purpose for which I grow tarragon in my garden.

Hey, where is all that protein coming from? It’s not from that small amount of hummus. It’s actually mostly from the pasta! There’s a fair amount in the marinara sauce, too.

So, that got me thinking – I’ve heard people say loads of times that animal products provide us with so-called “complete” proteins, while vegan foods do not. I should look at the in-depth protein profile of whole wheat pasta versus a beefsteak! Here it is – can you tell which is which based on presence vs absence of any particular amino acids?

Incomplete protein
Generated to compare protein composition, assuming the same total amounts of protein, not the same amounts of food.  Made using cronometer.com

I’ll give you a hint – even though both contain higher amounts of glutamic acid than any other amino acid listed, it’s the highest in pasta. And that’s good news for vegans! Glutamic acid is essential for making glutamine, one of the most important amino acids. Glutamine is necessary in coping with stress and for recovery from illness and strenuous exercise. It even helps to reduce fat storage. Read more here about why scientists have referred to it as an “internal fountain of youth”.

Are any of the essential amino acids (the ones we must consume because we cannot synthesize them ourselves: isoleucine, leucine, lysine, methionine, phenylalanine, threonine, tryptophan and valine) missing from the pasta? No! They are not. So, let’s put all of this monkey-business about incomplete protein in vegan diets to rest, shall we?

Back to the recipe. So far, everyone who I’ve forced to eat this has liked it. And so do I! Plus it’s so cheap to make, and so fast & easy to put together, that I think it could easily become a staple for a lot of people who try it.

Checklist items: .5 beans, cruciferous, 1 other vegetables, spices, 3 whole grains (6.5 out of 18 servings)

For easy reference, here’s what you’ll need to round out the day:

  • 2.5 beans
  • berries
  • 3 other fruits
  • 2 greens
  • 1 other vegetables
  • flaxseeds
  • nuts


Recipe Review: The Best Damn Vegan Sour Cream

The Quintessential Vegan Cream.

This stuff is absolutely amazing. It takes me 5 minutes to make. I’ve used it to replace sour cream, crème fraîche, mayonnaise, and cooking cream in dishes as diverse as tarts, cole slaw, and burritos. You can even use it in sweets. It serves as a base to which you can add any other flavors you’d like. The best part? It’s a delicious way to get your daily serving of nuts.

20170405_103124.jpg

It is, as advertised, The Best Damn Vegan Sour Cream. I use the recipe exactly as described by Savanna at Gluten-Free Vegan Pantry. This is the first recipe review in which I don’t recommend any changes. I even find the amount of salt to be appropriate. I tried adding more nutritional yeast once because I love it, and it just wasn’t as good, so now I stick to the original.

The recipe is repeated below for one reason – to make some of your lives easier by giving the ingredient amounts in metric (not available in the original).

  • 1 c. (135 g) raw cashew nuts, soaked for 8 hours or overnight
  • 1/4 c. + 2 T (90 ml) lemon juice
  • 1 tsp nutritional yeast (you might omit this for use in certain sweet items)
  • 1/2 c. (118 ml) water
  • 1/4 tsp salt

Throw everything in the blender and you’re done. In the original recipe, it says to blend for 5 – 7 minutes, but I get impatient and only blend for 3 – 4 minutes. It comes out really nice and creamy for me, but that may depend on your blender. Use the link given above to see lovely pictures of the ingredients and finished product.

More dilute than nut butters because about half the contents by volume are nuts, you can use about 4 T or 1/4 c. (60 ml) of cashew cream for one serving of nuts. I like to think about it this way: if I eat 2 sweet potato & black bean burritos, that’s 2 T for each burrito.

Vegan cashew cream has definitely added flavor to my meals, made more dishes possible, and helps me tick a box off my daily dozen with very little effort. This one’s a winner.

See my Sour Cream recipe page for more ideas on how to use this recipe as a base for other things.

Recipe Review: Root vegetable tagine

I found the original recipe for Root Vegetable Tagine on Epicurious. It’s by a woman named Molly Stevens and, looking at her profile, I can see that it’s definitely one of those accidentally-vegan recipes. I’ve made it a few times now, and have perfected it to my  own taste. The original recipe totally didn’t work for me, but I saw the potential and I did find that with just a few small changes, the recipe got not only seriously yummy, but also healthier, cheaper and quicker to make than the original! Wins all around! Here it is as I made it (and many thanks to Molly Stevens for the inspiration):

20170111_140619.jpg

The Recipe
  • 1 tsp coriander seeds
  • 1 tsp cumin seeds
  • 1 tsp caraway seeds
  • 1 tsp turmeric
  • 1/2 c. lemon juice
  • 1 medium onion, diced
  • 3 cloves garlic, minced
  • 2 T tomato paste
  • 2 large carrots (I chopped the carrots, turnips, sweet potatoes and celery rather small in order to cook them quickly)
  • 3 small turnips
  • 1 large celery stalk or a chunk of celeriac, roughly apple-sized (I used the latter)
  • 2 medium sweet potatoes, well-washed, skin-ON
  • 1 c. garbanzo beans
  • 1 c. bulgur (dry)
  • 4 c. vegetable broth (preferably homemade) or increase to 6 c. if you wish to cook the bulgur in broth rather than water
  • 1/2 c. fresh parsley, chopped
  • 1/2 c. fresh cilantro, chopped
  • 1/2 c. fresh mint, chopped

The original recipe called for 3 T olive oil, 3/4 c. olives, 1/4 c. sun-dried tomatoes, 1/2 tsp of crushed red pepper, only 1/4 tsp turmeric, and a whopping 4 1/2 tsps of salt, all of which I omitted. The salt was supposed to go into making preserved lemons, which I also left out simply to save some time. The lemon juice, which was meant for the preserved lemons, I repurposed by adding it to the tagine directly.

I did use 1/4 tsp of salt. I only left out the red pepper flakes because the last two dinners I’ve made have been seriously spicy, and I just wasn’t in the mood for a third.

The first time that I made the recipe, I included the olives and the sun-dried tomatoes. I absolutely hated the olives in this dish, though I’m an olive lover in general. For me, they just didn’t fit. The second time I made it, I decided that I didn’t really enjoy the sun-dried tomatoes, either, even though I’m generally a HUGE fan of them. Losing both of these items significantly reduces the cost of making this dish, while also reducing the salt  & oil contents, making it healthier.

I used vegetable broth in place of the water called for in the original to add another level of nutrients.

I also used far more herbs than the original recipe, which only called for 2 T cilantro and 1 tsp dried mint. In my opinion, if you’ve got more salt than mint in your recipe, something is off! I wanted to make my bulgur a little more bright and tabbouleh-ish to balance out the richness of the root veg.

I used regular old garbanzos rather than the spice-roasted ones called for, simply to reduce the amount of time it would take to pull this recipe together.

Last but not least, I used bulgur, a whole grain, rather than couscous, which is essentially a  type of pasta made with semolina flour.

Cooking Instructions

I did several things differently, so rather than refer you to the original recipe for instructions, I’ll tell you exactly what I did.

  1. Toast the spice seeds in a pan on medium heat until they become quite fragrant, just 2 or 3 minutes, then grind them and mix in the turmeric and salt.
  2. In a large pan, sauté the onions in a little of the broth until translucent, then add the garlic, and cook for another 3 – 5 minutes.
  3. Add the spices, tomato paste, and 4 c. broth; stir until the tomato paste is fully incorporated into the broth.
  4. Add the vegetables and the garbanzo beans.
  5. Cook, covered and on medium heat, stirring occasionally, until all the vegetables are tender, about 35 minutes, depending on the size of the cut.
  6. In the meantime, prepare the bulgur as instructed on the box, using broth rather than water, if desired. Once it’s ready, stir and allow to cool a little.
  7. Add the fresh herbs to the bulgur and stir them in.
  8. Serve the vegetables on top of the bulgur.
Nutrition Information

This recipe will feed 3 people with a hearty appetite. The nutrition information below is for 1/3 of the recipe as made here, with one exception – I didn’t include the use of my homemade vegetable broth in place of water. Also, I assumed canned garbanzo beans. Using cooked-from-dry will lower sodium content.

Root veg tagine nutrition info
generated using cronometer.com


Checklist items: just under 1 beans, just under 1 cruciferous, .5 greens, 3 other vegetables, spices, 2 whole grains (about 8 out of 18 servings)

For easy reference, here’s what you’ll need to round out the day:

  • 2 beans
  • berries
  • 3 other fruits
  • 1.5 greens
  • flaxseeds
  • nuts
  •  1 whole grains

And now I’m really wishing I were having this for dinner tonight! I’ll definitely be making it again very soon.


Recipe Review: Minimalist Baker’s sweet potato black bean burger

I frequently visit Minimalist Baker for inspiration in my meal planning – so many wonderful vegan recipes. And the sweet potato black bean burgers are no exception. Just get a load of this guy!

amazing-10-ingredient-sweet-potato-black-bean-burger-tender-flavorful-hearty-so-delicious
photo courtesy of Minimalist Baker

I kept fairly close to the original recipe, but did make some changes, and I have an interesting idea for the next time I make them! So, here’s how it went…

The Recipe
  • 2 c. mashed sweet potato
  • 1 c. cooked black beans, rinsed and drained
  • 1 1/2 c. cooked buckwheat
  • 1/2 c. almond meal
  • 1/2 c. diced green onion
  • 2 1/2 tsp ground cumin
  • 1 tsp smoked paprika
  • 1/4 tsp each salt and pepper

The original recipe had rice – I substituted buckwheat, and it worked very well.

The original recipe also suggests optional chipotle powder, which I would have added if I had any, but the recipe is good without it.

Also optional in the original is brown sugar, but I left that out, and the sweet potato itself was plenty sweet for me.

Finally, though the recipe calls for walnut or pecan meal, and I do think that might taste even better, I used almond meal because I have some that is on its way out & so I wanted to use it before it went bad. They tasted great as I made them, so don’t be afraid to make the same substitution if that’s easier for you.

For instructions, see the original recipe. At first, I was worried because my mixture seemed very wet compared to other vegan burgers that I’ve made, but they molded & held together perfectly!

Nutrition Information

I made 6 big patties (though the original recipe calls for 12). Here is the modified nutrition info for my burgers & the breakdown of how this recipe fits into Dr. Greger’s Daily Dozen. The nutrition info is for the burger recipe alone. The Daily Dozen checklist will be for the 2 patties together in one bun (mega-burger!) with 1/2 c. arugula, 1/4 c. tomato &/or onion. And, of course,  you can add anything else you’d like.

spbbb_nutrition_info
I generated this information using cronometer.com


Just look at all that dietary fiber! That’s because of the buckwheat.

Checklist items: 2/3 serving beans, cruciferous, 2 other vegetables , 1/2 nuts, spices, 3 whole grains (a little more than 8 out of 18 servings)

To more easily fit this into a daily meal plan, here is a list of the servings you will need to eat during other meals, snacks, dessert to complete the day:

  • 2 1/3 servings of beans ( = 1/2 c. + 1 T + 1 tsp hummus or 1 1/8 c. beans/tofu/tempeh or 2 1/3 c. peas/sprouted lentils)
  • 1 berries
  • 3 other fruits
  • 2 greens
  • 1 flaxseeds
  • 1/2 nuts ( = 1 T nut or seed butter or 1/8 c. nuts or seeds)

Just by way of suggestion, this might be a good day to have a berry fruity breakfast and a beans & greens lunch!

Performance

I loved the sweet potato black bean burger recipe! I think the original would be great but, as you can see, it’s also very tolerant of substitution, so you can play around with it a little like I did to make it fit what’s in your pantry, or any current passions (like my new-found love of buckwheat).

In terms of cooking, I brought these to a BBQ and cooked them on the grill. Others had been cooking meat, so I used aluminum foil on the grill-top, and then a little square of baking paper on each side of each patty to ensure they wouldn’t stick to the foil. They cooked wonderfully. The grill wasn’t very hot, and I was very hungry, so I didn’t let them cook for as long as I should have. Next time I’d like them to be chewier & firmer. But that’s all in the cooking. My partner was just happy that they weren’t burnt (he gets a little overzealous with the grill at home).

What will I change next time? Other than cooking them properly, I want to try substituting  in black rice! That will up the antioxidant power, and I bet it’ll look cool, too!

So, the final word is: definitely try this recipe and incorporate it into your daily dozen!

Today’s Health Morsel: Beets!

Today’s daily dozen meal plan starts out hot & sweet, ends with ice cream, and incorporates the beautiful beet. Plus, i’ll explain why nitrates are beneficial in beets but bad news in bacon.


breakfast_text

cornmeal_20160627_135454As the weather gets colder I have less desire for fruit in the morning. I’m a lot more interested in putting something warm in my belly. So, this morning I went for cornmeal mush.

  • 1/2 c. hot cornmeal mush w/
  • 1 T maple syrup
  • 1/4 c. dried figs
  • 1 nectarine

Checklist items: 2 other fruits, 1 whole grains (3 out of 18 servings)


lunch_text

Even though it’s late September now, I still have loads of fresh lettuce in the garden, so I’m having a nice big salad of beans & greens, all from the garden, with Chef AJ’s House Dressing for lunch.

  • 1 1/2 c. borlotti beans
  • 1/2 c. arugula
  • 2 c. kamikaze lettuce
  • 1 T ground flaxseed to sprinkle on top
  • a little fresh basil, coriander & mint

Checklist items: 3 beans, cruciferous, 2 greens, flaxseeds, spices (8 out of 18 servings)


dinner_text

beetroot-687251_640

Surprisingly, there’s a lot to say on the topic of beets. Let’s start with nitrates. Beets are high in nitrates. Nitrates can form nitrites, which are fine in themselves, but they can go on to form either nitric oxide or nitrosamines. Nitrosamines are carcinogenic – cancer-causing – so we definitely want to be sure that our beets are not giving us cancer. No worries! Nitrosamines form from nitrites in processed meats, in the absence of plants. This occurs in the meat itself before it ever makes it onto a dinner plate, so, even though a measly 20 mg of vitamin C blocks nitrosamine production, adding a salad to your sausage dinner isn’t going to help.

Nitric oxide, on the other hand, is what we get when we eat beets or other nitrate-rich whole vegetables. Our bodies love nitric oxide! It makes energy production more efficient by requiring less oxygen. This increases athletic performance, as well as endurance of any physical activity in people with emphysema, high blood pressure, and peripheral artery disease. It also helps to reduce blood pressure, increasing blood-flow especially to at-risk areas of the ageing brain. A side-effect of the body being able to produce energy more efficiently is metabolism reduction. That might sound scary, like beets will make you gain weight, but slower metabolism is actually associated with longevity. Nitric oxide is also effective at removing carcinogenic bile acids from our bodies. Of several vegetables tested, beets were #1 for this particular task (even beet-ing out kale).

There’s just one down-side. Though the best way to prevent most kidney stones it cutting meat out of the diet, people who are predisposed to absorbing oxalates may want to limit their consumption of beets, as they are a high-oxalate food. And, just in case you want to be extra sure that nitrite doesn’t turn into nitrosamine – you can always eat nitrate-rich foods with a single slice of bell pepper, or eat 2 strawberries before dinner. That’s all the vitamin C you’ll need (see sources).

The recipe I’m making comes from the Kitchn: Vegan Beet Pesto Pasta. I eyed it skeptically for a while before deciding to try it. It was amazing!! I absolutely loved it. And, as you might imagine, the color of your pesto makes this a fun meal to try with kids or guests. Plus, it’s super-fast to make – you basically throw the ingredients in a blender and it’s ready, making it the perfect dinner after a busy day. I made just 1 change from the original recipe, which was wp-1474350881956.jpgto replace the olive oil with the same amount of aquafaba. The amounts below reflect 1/4 of the original recipe, which was my serving size.

  • 1 1/2 c. cooked & drained whole wheat pasta
  • 1/2 clove garlic
  • 2 T crushed almonds
  • 1/2 large purple beet, cooked & peeled (a/b 1 c.)
  • 5 T aquafaba
  • 1 1/2 tsps red wine vinegar
  • salt, to taste
  • chives, minced (optional)

Put everything except for the pasta into a food processor or high-speed blender and blend until smooth (or see the Kitchn’s instructions, which are a bit more…complete. Don’t worry it’s only one more step). Toss with hot pasta and garnish with chives, if desired. Also, see the original recipe for much more beautiful pictures of this dish.

Checklist items: 2 other vegetables, 1/2 nuts, spices, 3 whole grains (6 1/2 out of 18 servings)


dessert_text

Banana-raspberry ice dream for dessert will finish off our fruit & nut requirements for the day. Life’s hard, eh?

  • 1 large frozen banana
  • 1/2 cup frozen raspberries
  • 1 1/2 tsp vanilla
  • 2 T crushed hazelnuts

Put everything into a high-speed blender. Pulse until the bananas are broken into small chunks and then blend until it’s the consistency of ice cream. Serving with crushed nuts on top.

Checklist items: berries, 1 other fruit, 1/2 nuts, spices (3 1/2 out of 18 servings)


Taking account of the day:

21 servings in total.

We got at least the minimum recommended servings of everything today, plus 2 extra servings of spices & one of whole grains.

The power of the (cauli)flower

Breakfast_text
wp-1473074297458.jpgI’m still on my fresh fruit breakfasts, though probably not for much longer as the weather is beginning to show signs of cooling. Sad face. But for the moment, I’ve got a second round of raspberries ripening in my garden.

  • 1/2 charentais melon (a/b 2 c.)
  • 1/2 c. raspberries

Checklist items: berries, 2 other fruits (3 out of 18 servings)


lunch_textI love bean salads! It occurred to me that I haven’t had dill in a long time, even though it’s an herb that I absolutely adore, so I’m rectifying that right now! Lunch is a 3-bean salad with lemon-dill dressing. dill-1347095_640

  • 1/2 c. garbanzos
  • 1/2 c. kidney
  • 1/2 c. string beans, cut into 1-inch pieces
  • 2 c. chopped spinach or mustard greens
  • 1/2 c. cannellini
  • 1 small garlic clove
  • 2 T vinegar of choice
  • 2 T lemon juice
  • 1 T mustard
  • 2 T chopped fresh dill
  • salt & pepper, to taste
  1. Add the garbanzo, kidney, & string beans to a salad bowl along with the greens.
  2. Put the cannellini into a blender, along with the garlic, vinegar, lemon juice, mustard, dill, and s & p, and blend until creamy. Add aquafaba if necessary to thin the dressing to your desired texture.
  3. Mix the dressing into the beans and let stand in the refrigerator for at least 30 minutes. If you can prepare it the day before you plan to eat it, the flavors will marry even better.

Checklist items: 3 beans, 2 greens, 1 other vegetables, spices (7 out of 18 servings)

*the string beans technically count as other vegetables rather than beans


Dessert_text
Post-lunch sort of dessert today. Date & nut milk.

Checklist items: 1 other fruit, flaxseed, nuts, spices (4 out of 18 servings)


dinner_textWith vegetables, color usually goes hand-in-hand with nutrient density, but cauliflower is a glowing exception. Even white cauliflower is a powerhouse, easily holding its own among its green brothers & sisters in the cruciferous family. Cruciferous veg are especially protective against prostate and colorectal cancers (but help fight other cancers, too) and cardiovascular disease, as well as helping to regulate blood cholesterol levels, increasing overall immune function, and helping to protect your eyesight and your brain (see here and here for more information).

purple_cauliflower-1218701_640
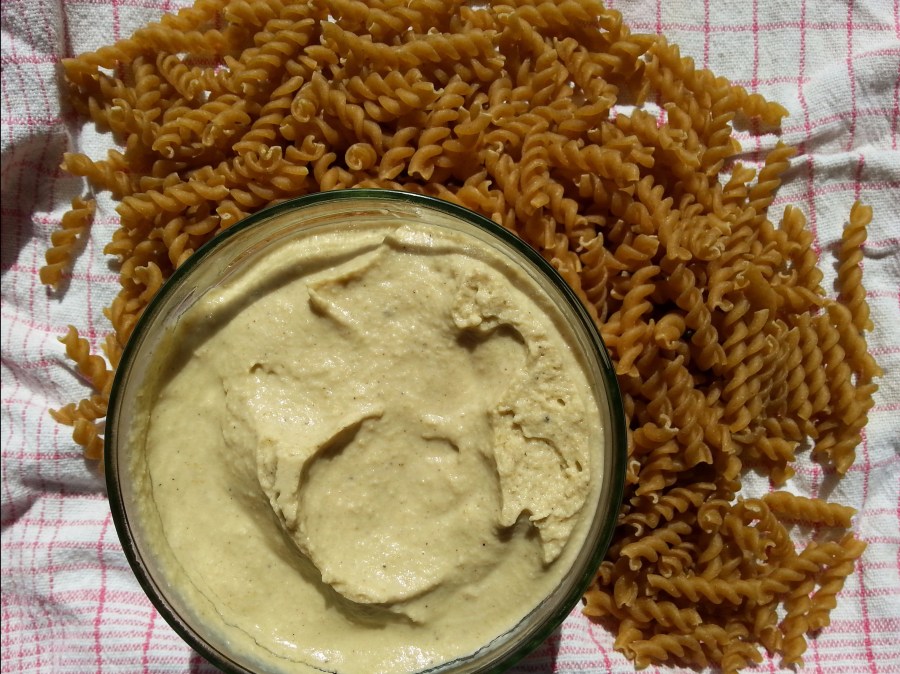
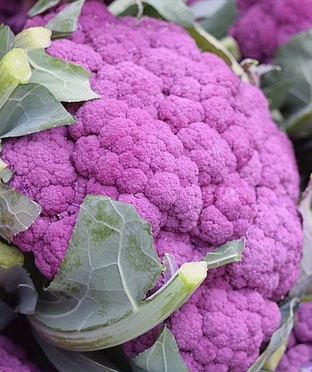
Plus, cauliflower is a hearty, filling, warming veg for those cold, rainy nights, like I’m having here tonight. Dinner is a cauliflower alfredo with whole grain pasta. If you want to get funky, use a purple or orange cauliflower. My recipe is based on the one from Oh She Glows, with some changes.

  • 2 c. cauliflower, roughly chopped
  • 2 lg garlic cloves, 1 minced
  • 1/4 c. aquafaba or plain, unsweetened almond milk
  • 1/4 c. parsley
  • 1/4 c. nutritional yeast
  • 1 T lemon juice
  • 1 tsp mustard powder
  • 1/2 tsp each garlic & onion powder
  • salt & pepper to taste
  • 1/2 c. string beans, chopped (fresh from the garden, if you’ve got ’em!)
  • 1 1/2 c. whole grain pasta, cooked (I used wheat)
  1. Boil the cauliflower until just tender, about 10 minutes.
  2. In the meantime, water-saute the beans and the minced garlic until the garlic is cooked. The beans can stay nice & crunchy to add some texture to the dish.
  3. When draining the cauliflower, reserve some of the cooking liquid in case you need it to make your alfredo sauce a little less thick.
  4. Place cooked cauliflower, 1 garlic clove, aquafaba or milk, parsley, nutritional yeast, lemon juice, mustard, and spices into a blender & blend until smooth & creamy. If you need to, you can add some of the reserved cooking water. The mustard is important for the nutritional benefits of cauliflower. If you don’t have mustard powder, no problem! Just plan a little ahead and chop the cauliflower at least 40 minutes prior to cooking it. To find out why, see this video.
  5. Mix everything together in a large serving bowl.

Checklist items: cruciferous, 1 other vegetables, spices, 3 whole grains (6 out of 18 servings)


Taking account of the day:

20 servings in total.

We got at least the minimum recommended servings of everything today, plus 2 extra servings of spices. That’s never a bad thing!

Review: buckwheat

Why buckwheat?

I decided to give it a try after seeing it used in a recipe as a sort of salad garnish, like croutons, only not.

wp-1469095549384

When I finally found it (my region is not known for variety in its cuisine) I saw that I had 2 options – toasted or untoasted. Since the untoasted bag was about half the price of the toasted, I went for that one.

Nutrition info

Reading the label: per 100 g, dry.

corn vs wheat

In my review of corn pasta, I used cronometer to figure out the amount of dietary fiber, since it wasn’t listed on the package. In order to check to see how accurate cronometer may or may not be on that score, I entered buckwheat into cronometer, too. It says that 100 g of dry buckwheat contains 10.3 g fiber. So, obviously, it can vary and the numbers to the left are specific to the brand that I purchased.

Performance

wp-1469095778939The first thing I wanted to do with it was to try it like I’d seen in the recipe – sprinkled on salad. So, I toasted them in a pan on the stove over low-med heat for about 20 minutes, shaking the pan occasionally to make sure they’d toast evenly.

It smelled so good – like fresh-baked bread!! And they added the most wonderful crunch to the salad. I know umami is meant to apply to flavor, but if it can be applied to texture, then it perfectly describes what toasted buckwheat adds to a salad!

Next, I wanted to try it as a cooked grain, like rice, so I added 1 part buckwheat to 2 parts boiling water, turned the heat to low and let it cook for 30 minutes. I didn’t add any flavoring because I wanted to understand the taste of the buckwheat by itself before using it in other ways. It has a clean taste, a good foundation for any flavors you want to add to it. I think if I’d toasted the buckwheat before putting it in the water, it would perhaps have a slightly nutty flavor, but I’ll have to try it before I say for sure.

But what struck me, again, was the texture! Even cooked like rice, I still really love the texture of buckwheat!

When it was done, I added some cooked mushrooms and a little dressing, and ate some of it hot. Nice. Then I set it aside to taste it cold – I maybe liked it even better cold! I think this will be a really nice grain for tabbouleh-style cold salads.

If you haven’t tried buckwheat yet, I recommend you hop to it! It’s my new favorite thing.

Are you a fan of buckwheat? What’s your favorite way to eat it?

Review: corn pasta

Why corn pasta?wp-1469009419913.jpg

Variety! And because corn pasta is a nutritious whole-grain alternative to regular pasta, (suitable for people with Celiac’s). Usually, I go for whole wheat pasta because it’s the cheapest alternative where I live, but last weekend, I sprang for the corn stuff. Here’s how it turned out…

Nutrition info

Reading the labels: corn vs whole wheat, per 100 g, dry.

corn vs wheat

Did you notice that little asterisk * next to dietary fiber? That’s because I’m a little unsure about this one. Since the information for dietary fiber isn’t listed on the package, I entered it into cronometer. According to cronometer, corn pasta has a slight edge over whole wheat. However, my corn pasta is a mix of 80% corn and 20% rice – rice pasta being much lower in fiber content – so in my case, they’re probably about even. Of course, that’s all a big guess.

Performance

I thought that this bright yellow corn pasta would be pretty on the plate. In the end, the color cooked out of it, and it looked like a regular white pasta – that’s good news if you’re trying to get a skeptic to eat it – you can serve it to them and they’ll be none the wiser until you tell them, especially since it also tastes quite ‘normal’. It didn’t stand out as having a particularly corn flavor, and I found it to be roundly fulfilling, if slightly lighter than whole wheat pasta.

A note about cooking corn pasta

While it performed well in the pasta bowl, I was underwhelmed with the cooking process. With ‘regular’ pasta and whole wheat pasta alike, you have to stir it in the beginning to ensure it doesn’t stick to the bottom of the pan, but, once it gets rolling, you can leave it alone until it’s time to drain. Not so with corn pasta – the more it cooked, the more it wanted to stick to the bottom, so you have to stir it consistently during cooking.

It also created loads of foam. I suppose that’s neither here nor there, but it’s just one more reason why you have to keep stirring it while it’s cooking.

Overall, I like it but I won’t go out of my way to get it over the cheaper and easier-to-find (in my area, anyway) whole wheat pasta. For people who have to avoid wheat, it’s a perfectly reasonable substitution other than the hassle of constant stirring.

Have you had corn pasta? If so, what did you think?